Showing posts with label casserole. Show all posts

Tuesday, February 16, 2016

Tasty Tuesday: Vegetarian Spinach, Artichoke, and Feta Breakfast Casserole

Eric and I don't really do anything special for Valentine's Day. Neither of us hate it or anything ... We just prefer to spend our time and money celebrating birthdays and our wedding anniversary. We also always go out for a nice dinner on New Year's Eve, but that's kind of a random tradition we started a few years ago because it seemed like a good excuse to try a new restaurant. (And because we like food, obviously.)

That being said, this year we decided to make a couple of really good meals at home. If you follow me on Instagram, you've probably already seen our Valentine's Day dinner:
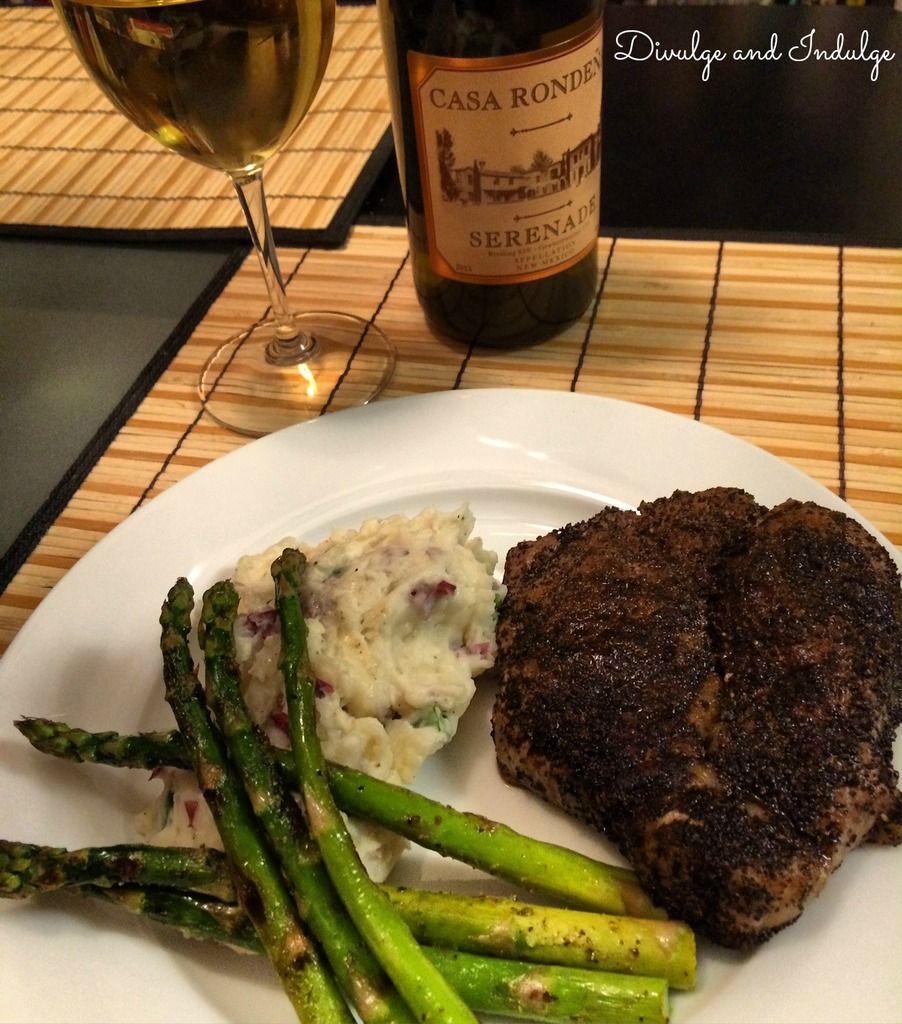
 photo ValentinesDayDinner2016_zpsfdnylcne.jpg
Eric made the coffee crusted steaks and grilled asparagus, and I made the red garlic mashed potatoes. They're so unhealthy (hello, entire stick of butter and heavy cream!), but they're my absolute favorite type of mashed potatoes. We don't make them often, but when we do, you better believe I eat the shit out them!

But I'm getting sidetracked ... Those potatoes aren't the focus today.

Today I'm sharing the meal we made for our Valentine's Day breakfast.
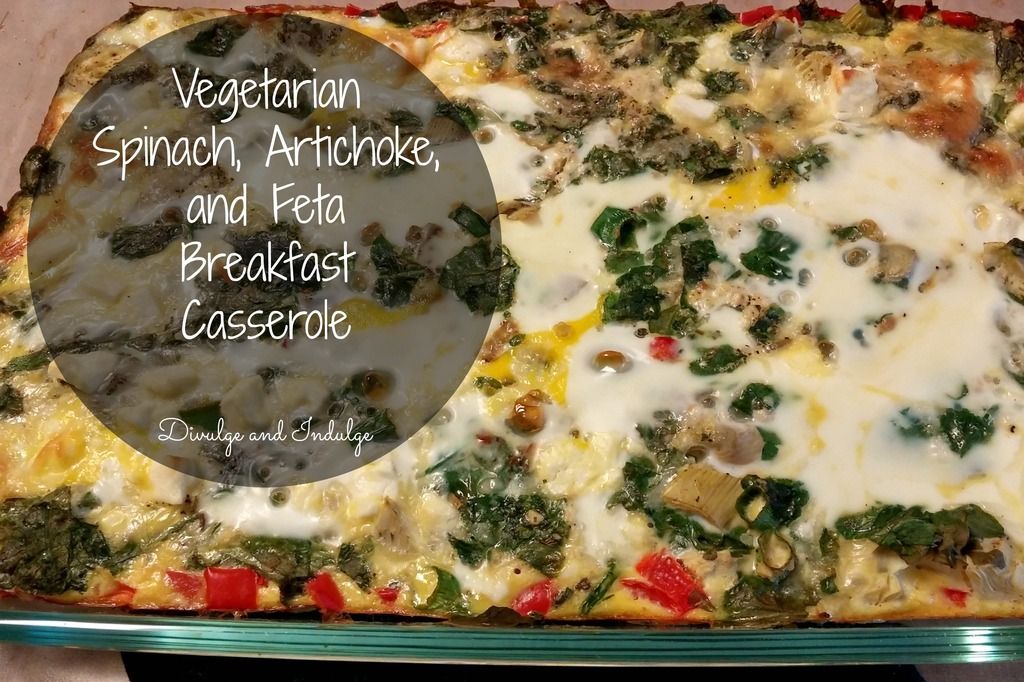
 photo VegetarianSpinachArtichokeandFetaBreakfastCasserole_zps6p4svcu6.jpg
In an effort to combat our calorie rich dinner (complete with a bottle of wine and brownies and gelato for dessert), we decided to stick with a healthier breakfast.

This breakfast casserole is beyond easy to throw together, and, if spinach and artichokes aren't your thing, it's pretty versatile. I think I'll probably play around with this basic recipe in the future, but this time I mostly stuck with the original recipe (with a couple of small changes).

Vegetarian Spinach, Artichoke, and Feta Breakfast Casserole

Adapted ever so slightly from a recipe on Skinnytaste.

Ingredient List:
  • 1 10 oz. package of frozen chopped spinach (thawed and with all excess liquid squeezed out)
  • 1 13.75 oz. can quartered artichoke hearts, drained and roughly chopped
  • 1 medium red bell pepper, diced
  • 1/2 cup green onions, diced
  • 8 large eggs
  • 4 large egg whites
  • 1/4 cup milk (I used 1%.)
  • 1/4 cup Parmesan cheese, shredded
  • 1/2 cup crumbled feta cheese
  • 2 cloves garlic (or, if you're lazy like me, the equivalent of jarred, pre-minced garlic)
  • 1 tsp black pepper
  • 1 tsp sea salt
  • 1 tsp Mrs. Dash Italian Medley

Instructions:

1.  Preheat the oven to 375 degrees.

2.  Spray a 9x13 inch pan with cooking spray.

3.  Combine the spinach, artichokes, red bell pepper, green onion, and garlic in the baking pan, stirring several times to combine and spread the ingredients evenly throughout the dish.

4.  In a medium bowl, whisk together the eggs, egg whites, milk, Parmesan cheese, black pepper, sea salt, and Mrs. Dash Italian Medley.

5.  Stir the crumbled feta into the egg mixture, then pour evenly over the vegetables in the pan.

6.  Bake for 32-35 minutes (I baked mine for 33 minutes, and it was perfect), or until a knife inserted near the center comes out clean.

7.  Allow the casserole to stand at room temperature for 8-10 minutes before cutting. 

Tuesday, September 8, 2015

Tasty Tuesday: Chorizo Breakfast Enchilada Stack

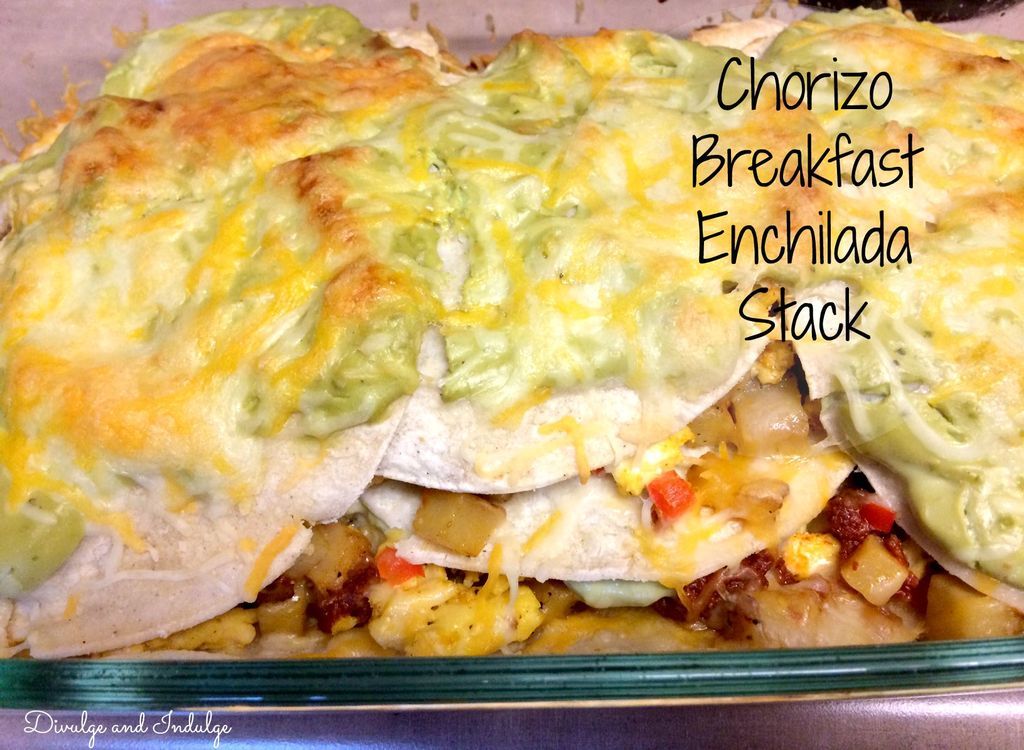
I really hate that I wasn't able to get a great picture of this meal because it tastes so much better than the photo below would have you believe.

 photo ChorizoBreakfastEnchiladaStack_zpsoslxto1e.jpg

I have to admit, though, that this wasn't my original vision.

When I first started thinking about some new recipes to try, I decided I would come up with a breakfast enchilada dish. Breakfast burritos are one of my absolute favorite things, so making a few simple changes to transform a burrito into an enchilada seemed like an easy and obvious thing to do.

Unfortunately, it wasn't as easy as I initially thought.

I make enchiladas pretty regularly, and I've never had the issues I had when I was trying to make this meal. 

When I first started rolling the corn tortillas around my filling, everything was fine ... And then they started cracking and spilling shit everywhere. I made it through about 4 enchiladas before I decided I should probably rethink my original plan and come up with something else.

And so this breakfast enchilada stack was born.

Like I said, it's not the prettiest dish. The corn tortillas weren't immune to cracking even after I decided to stack them instead of roll them. I made a ton of filling, so it's kind of spilling out the sides (and I still had some left over that I used for burrito bowls!). And I can never seem to make any avocado sauce look appetizing in pictures (even though it always tastes amazing). 

But you know what? I'm proud of this meal. I'm proud because I came up with a recipe using my knowledge and experience, and, when it didn't work out the way I wanted it to, I managed to figure out a way to save it. 

Is this the best food picture I've ever shared on my blog? Absolutely not. Hopefully you can overlook the less than perfect photo, though, and see this meal for what it is: spicy, flavorful, filling, and delicious.

Chorizo Breakfast Enchilada Stack

A Divulge and Indulge original recipe. (Sauce adapted from a recipe on Gimme Some Oven.)

Ingredient List:
  • 0.75 lb chorizo sausage
  • 1 large red bell pepper, diced
  • 4 small Yukon Gold potatoes, peeled and diced into very small (about 1 inch) chunks
  • 1 medium red onion, diced
  • 6 eggs
  • 1 tbsp milk (I used 1%.)
  • 1 medium jalapeño pepper (You don't need to chop this since it will be going in the food processor, but if you don't want the sauce to be very spicy, you should cut it enough to remove some of the seeds.)
  • 2 avocados
  • 1 lime
  • 2 tbsp low fat margarine or butter (I used low fat margarine.)
  • 2 tbsp flour
  • 1 cup chicken broth
  • 1 cup sour cream (I used low fat, and it worked well.)
  • 15 corn tortillas (soft taco size)
  • 1 1/2 cups shredded Mexican blend cheese (I used Sargento 4 Cheese Mexican blend.)
  • 1 tsp cilantro
  • 1 tbsp olive oil
  • 1 tsp sea salt
  • 3 tsp black pepper, divided
  • 4 tsp garlic salt, divided

Instructions:

1.  Preheat the oven to 425 degrees.  

2.  Heat the olive oil in a large skillet over medium heat.

3.  Add the diced potatoes and red onion to the skillet and season with 2 tsp garlic salt and 2 tsp black pepper. Cook over medium heat until the potatoes and onions have softened a bit and the potatoes start to brown.

4.  Crumble the chorizo sausage into a separate medium skillet. Cook over medium heat until completely browned.

5.  Once the potato/onion mixture and chorizo sausage have finished cooking, mix them together in a large bowl and set aside.

6.  Wipe out the large skillet that previously held the potato/onion mixture, spray with cooking spray, and place back over medium heat.

7.  Crack the eggs into a medium dish with a lid (I usually just use a Tupperware dish), and add the diced red bell pepper, sea salt, and remaining 1 tsp black pepper. Cover and shake vigorously, then pour the mixture into the large skillet.

8.  Pour the milk into the egg mixture and continue to cook over medium heat, scrambling with a spoon or spatula. 

9.  Once the eggs have finished cooking, transfer the egg mixture into the large bowl with the potato/onion mixture and chorizo sausage. Stir to combine and set aside.

10.  Melt the butter in a small saucepan.

11.  Add the flour, then slowly pour in the chicken broth, stirring well to get rid of any lumps.

12.  Bring this mixture to a boil, then reduce heat to medium low. Allow the sauce to simmer for approximately 5 minutes, stirring often.

13.  Add the sour cream, cilantro, and remaining 2 tsp garlic salt to the sauce. Stir well to combine.

14.  Add the avocados and jalapeño pepper to a food processor, blending until fairly smooth. (It's okay if there are some lumps at this point.)

15.  Slowly pour the sauce into the food processor, blending with the avocados and jalapeño pepper until smooth and creamy. (Be very careful blending hot liquid in a food processor! Make sure you open the lid regularly to allow heat to escape!)

16.  Squeeze the juice from the lime into the sauce, and pulse a few more times until everything is thoroughly mixed.

17.  Spray a 9x13 inch pan with cooking spray.

18.  Place 6 corn tortillas across the bottom of the pan, then cover with about 1 1/2 cups of the filling from the large bowl, about 1/2 cup of the Mexican blend cheese, and about 1/2 cup of the avocado cream sauce. (These amounts are approximate. I didn't actually measure out how much I used between each layer, so just use your best judgment.) 

19.  Stack 3 corn tortillas across the center of the filling/cheese/sauce mixture, and add more filling, cheese, and avocado cream sauce.

20.  Place the last 6 corn tortillas across the top of the center layer and finish off with the remaining cheese and avocado cream sauce.

21.  Bake for 20-25 minutes, or until the cheese has completely melted.

I know this probably looks like a lot of ingredients and a lot of work (and it kind of is). But trust me ... It's well worth it! If you're also a huge fan of breakfast burritos, you should definitely give this a try!

Tuesday, March 3, 2015

Tasty Tuesday: Arni Giouvetsi

I was really excited to write today's Tasty Tuesday post because today I'm sharing one of our favorite meals.  We don't have it that often (mostly because ground lamb is $10.00/lb and that just seems ridiculous), but when we do, we're reminded exactly why we love it so much.

As with most Greek dishes, the flavors are simple and comforting.  Arni Giouvetsi (also spelled Arni Youvetsi) reminds me of something you'd have at a large family dinner on a Sunday afternoon ... It's not particularly fancy, but it is delicious!

I don't make this dish in the traditional way (with a shoulder or leg of lamb) for two reasons: I like the way the ground lamb mixes in completely with the dish (you basically get a bite of meat with every bite of orzo, tomatoes, and onions) and, to be perfectly honest, ground lamb is easier for me to find.  If you want to try making a more traditional Arni Giouvetsi, I'd recommend clicking over to Elly Says Opa (the link to this meal can be found below the recipe title) and following her instructions.  If you're like me, though, and prefer using ground lamb, you can use the recipe below.  I didn't make that many changes from the original recipe, but some of the cook/bake times are different, so make sure you follow the instructions that correspond with the type of lamb you're using!

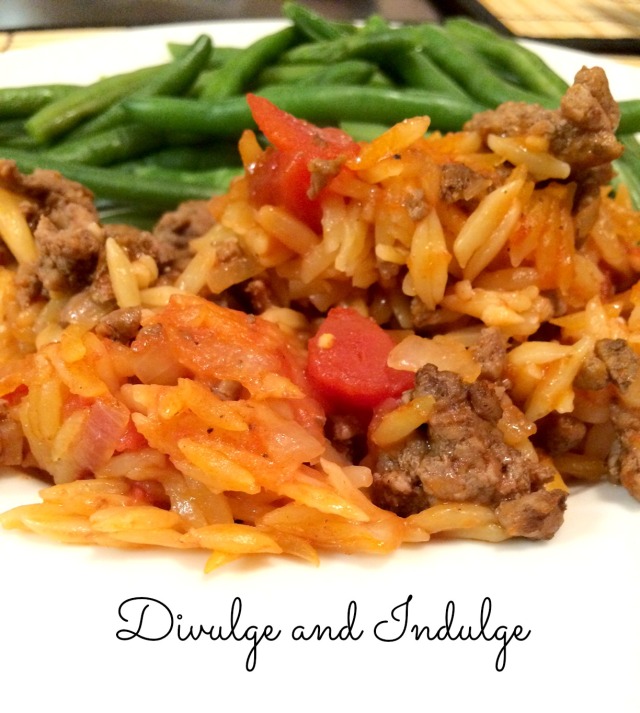
ArniGiouvetsi
Looking at this picture makes me sad that we don't have any more leftovers.


Arni Giouvetsi

Adapted ever so slightly from a recipe on Elly Says Opa.


Ingredient List:
  • 1-1 1/2 lbs ground lamb (I used a 1.07 lb package of ground lamb last time)
  • 1 tbsp olive oil
  • 2 tsp sea salt (plus additional to taste)
  • 2 tsp black pepper (plus additional to taste)
  • 1 white onion, diced
  • 3 cloves garlic (or, if you're lazy like me, the equivalent of jarred, pre-minced garlic)
  • 4 tbsp tomato paste
  • 1 14.5 oz. can diced tomatoes
  • 3 cups water or broth (I always use water in this recipe because I like the flavor of the lamb to shine through, but I'm sure it would also be great with chicken broth)
  • 1 16 oz. package orzo

Instructions:

1.  Preheat the oven to 300 degrees.

2.  Spray a 9x13 inch pan with cooking spray.

3.  Heat the olive oil in a medium skillet.  Add the ground lamb and season the meat with the salt and pepper.

4.  Cook the lamb until just brown, breaking it up as it cooks.  (This shouldn't take more than 20 minutes or so.)

5.  Once the lamb is cooked through, add it to the 9x13 inch pan.  (Make sure you retain at least some of the juices in the skillet for the next step!)

6.  In the same skillet, add the diced onion and cook until tender.

7.  Add the garlic and tomato paste to the onions and cook for 30-60 seconds, or until the garlic is fragrant and the tomato paste has started to cook off and become incorporated with the onions.

8.  Pour in the diced tomatoes (with their juices) and the water (or broth).  Bring the mixture to a boil, stirring occasionally.  Season to taste with additional sea salt and pepper.

9.  Cook the tomato mixture for about 3-5 minutes at a boil, then pour the liquid around the lamb in the pan.

10.  Bake uncovered for 25-30 minutes before adding the orzo.  (I used the full 30 minutes.)

11.  Remove the pan from the oven and increase the heat to 350 degrees.

12.  Add the orzo to the lamb and tomato mixture in the pan, stirring several times to ensure the orzo is completely covered with liquid.

13.  Bake uncovered for an additional 20-30 minutes, or until most of the liquid has evaporated.  (I only baked mine for 20 minutes.)

The ingredient list is pretty short and simple, but it does take some time to prepare.  It's well worth the effort, though!  As for sides, I think this meal is best served with a steamed green vegetable (I made green beans the last time we had this).

Tuesday, November 4, 2014

Tasty Tuesday: Creamy Chicken and Broccoli Casserole with Rice

Sometimes I have intense cravings (and no, I'm not pregnant!), and I just can't stop thinking about certain foods (or flavor combinations).  As much as I may try to ignore these cravings, they'll creep into my mind and just stick there until I finally give in.  (Let's hope I have a little more self control when I actually am pregnant since I'd like to avoid packing on 50 pounds ... That's a lot for a short person like myself!)

Recently I was craving something with chicken and broccoli.  I started searching for some recipes online, but nothing really sounded good.  And then, after way too much time on Pinterest, I found the recipe I'll be sharing today.

I made several changes, and the result was exactly what I was looking for.  It was creamy and cheesy and delicious ... Total comfort food.  This is a perfect meal for a cozy night in, especially a chilly night (and I'm sure we'll be having more of those in the near future since it's November and all).

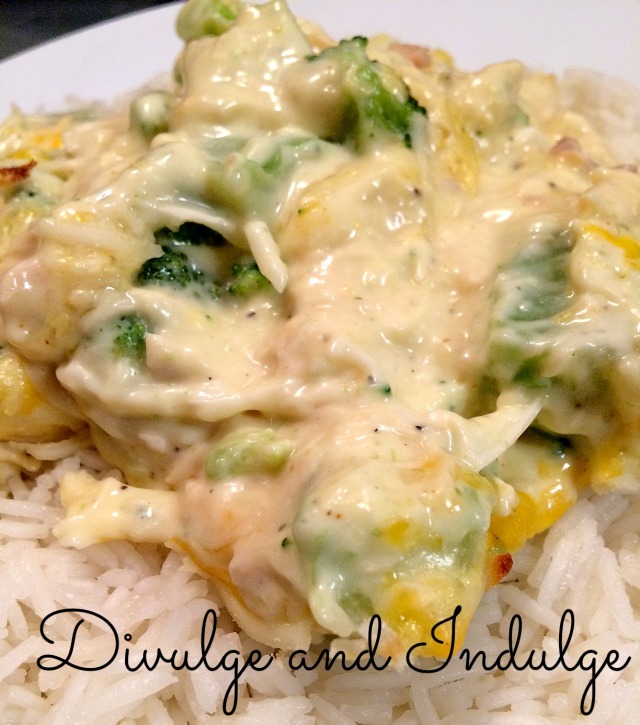
Chickenbroccoli1
Casseroles aren't really the easiest thing to get a good picture of, but this one wasn't too bad.  Just trust me ... This meal is awesome!


Creamy Chicken and Broccoli Casserole with Rice

Adapted ever so slightly from a recipe on Life in the Lofthouse.


Ingredient List:
  • 3 boneless, skinless chicken breasts
  • 2 10 oz. cans cream of chicken soup (I always use the 98% fat free cream of chicken soup from Campbell's)
  • 1/2 cup mayonnaise (I used light mayonnaise)
  • 1/2 cup sour cream (I also used light sour cream)
  • 1/2 cup chicken broth
  • 1/2 cup white wine
  • 2 cups water
  • 1 cup shredded mozzarella cheese, divided
  • 1 cup shredded cheddar Jack cheese, divided
  • 1 bag frozen broccoli cuts (I used a 1 lb bag)
  • 1 tbsp garlic salt + 1 additional tsp garlic salt  (Some will go into the chicken while it cooks and the additional will go into the actual casserole)
  • 2 tsp Mrs. Dash Original Blend + 1 additional tsp Mrs. Dash Original Blend  (As with the garlic salt, some will go into the chicken and the additional will go into the casserole)
  • 2 tsp paprika
  • 2 tsp black pepper
  • 1 tsp onion powder
  • 6 cups cooked rice (I used basmati rice and cooked it in a half chicken broth/half water mixture to give it some extra flavor)

Instructions:

1.  Place chicken, water, chicken broth, 1 tbsp garlic salt, and 2 tsp Mrs. Dash Original Blend in a crockpot and cover.

2.  Allow the chicken to cook for 6-8 hours on low (or, if you're like me and don't start the crockpot early enough, you can also cook it on high for an hour, then switch it over to low for another 3 hours).

3.  Near the end of the cooking time, preheat the oven to 375 degrees.

4.  After it has thoroughly cooked, remove the chicken from the crockpot and place it on a cutting board.

5.  Shred the chicken with two forks (it should be tender enough that it pretty much falls apart).

6.  Spray a 9x13 inch pan with cooking spray.

7.  In a large bowl, combine the cream of chicken soup, white wine, mayonnaise, sour cream, broccoli, shredded chicken, 1/2 cup of the mozzarella cheese, 1/2 cup of the cheddar Jack cheese, paprika, black pepper, onion powder, 1 tsp garlic salt, and 1 tsp Mrs. Dash Original Blend.

8.  Pour the mixture into the 9x13 inch pan.

9.  Top the casserole with an additional 1/2 cup each of the mozzarella and cheddar Jack cheeses.

10.  Bake the casserole for 20 minutes, or until the cheese is melted and bubbly.

As I said earlier, this casserole is perfect comfort food (especially when served over rice).  It's also a very complete meal, so you don't necessarily need a side dish (though I'm sure either a salad or a steamed vegetable would be a good option if you wanted something else).