Showing posts with label potatoes. Show all posts

Tuesday, July 26, 2016

Tasty Tuesday: Mustard Roasted Potatoes

I know it's 500 degrees outside with 1000% humidity right now (or at least it's been feeling that way in Nebraska lately) and the last thing you probably want to do in such stifling weather is turn on your oven, but I'm sharing this recipe today anyway for a couple of reasons.

First, I rarely share side dish recipes. To be perfectly honest, I usually focus on the main dish and stick with easy sides: salads, Steamfresh veggies, and, yes, even boxed Rice-a-Roni. Eric and I both like all of these things, but I have to admit that sometimes we get a little bored having the same sides over and over. So sometimes it's nice to change things up a bit and try something new.

My second reason for sharing this recipe today is that, despite the fact that it involves roasting potatoes, it feels like a summer side dish to me. It could be that the mustard and potato combination reminds me of potato salad. It could be the knowledge that these potatoes are the perfect compliment to a burger. Who knows? All I know is that it felt right to share this recipe today.
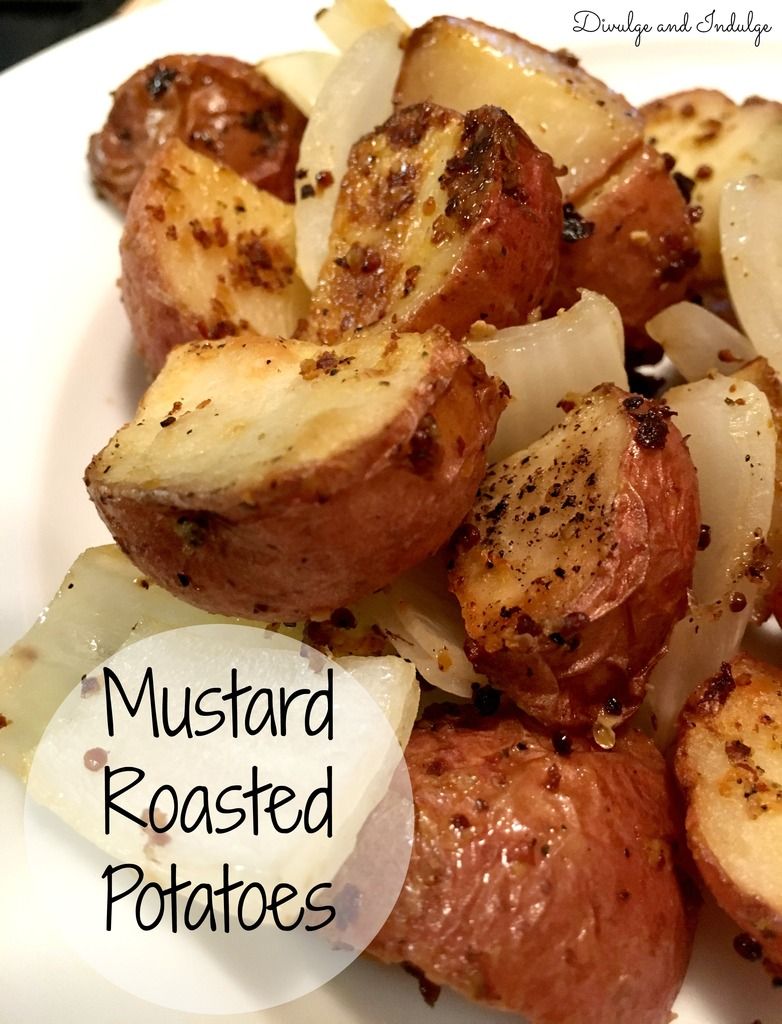
 photo MustardRoastedPotatoes_zpsnywwon5u.jpg

I know that a lot of people don't love mustard. I don't know how that's possible, but I know it's true. (Just kidding. I hate a lot of things that most people enjoy, like cinnamon buns and watermelon. I get that everyone's tastes just aren't the same.)

Anyway, the point is that although these potatoes do have a bit of a tangy flavor, I didn't think they really tasted strongly of mustard. (Eric agreed.) We both love mustard, but, even though that flavor didn't shine through as much as we'd hoped, these potatoes were still damn good.

If you hate mustard, obviously you probably wouldn't want to try these potatoes in the first place. (And I can't say that I blame you.) But, if you even just like mustard a little, I'd say give these a try. (You can always cut the amount of mustard down to 2 tbsp if you're still concerned the flavor will be too strong.)

Mustard Roasted Potatoes

Adapted ever so slightly from an Ina Garten recipe on The Food Network.

Ingredient List:
  • 1 1/2 lbs small red potatoes, quartered
  • 1 small yellow onion, cut into short, thick strips
  • 3 tbsp olive oil
  • 3 tbsp Dijon mustard
  • 1 tsp garlic salt
  • 1 tsp black pepper

Instructions:

1.  Preheat the oven to 375 degrees.

2.  Line a baking sheet with aluminum foil and coat with cooking spray. 

3.  Place the quartered potatoes on the baking sheet and toss with the olive oil, Dijon mustard, garlic salt, and black pepper.

4.  Bake the potatoes for 50 minutes to 1 hour, stirring occasionally.

5.  At about 15 minutes before the end of cook time, add the yellow onion to the potatoes and stir well to combine. Once you've added the onions, you'll want to check on the potatoes a little more frequently to ensure the onions don't burn.

I personally think that side dishes should be easy, and these potatoes are no exception. Although they require quite a bit of time in the oven, the prep work is minimal and there aren't a lot of complicated instructions or fancy ingredients involved. And, once they're in the oven, you can focus on your main course (as long as you continue to check on your potatoes and stir them once in a while!).

Tuesday, April 5, 2016

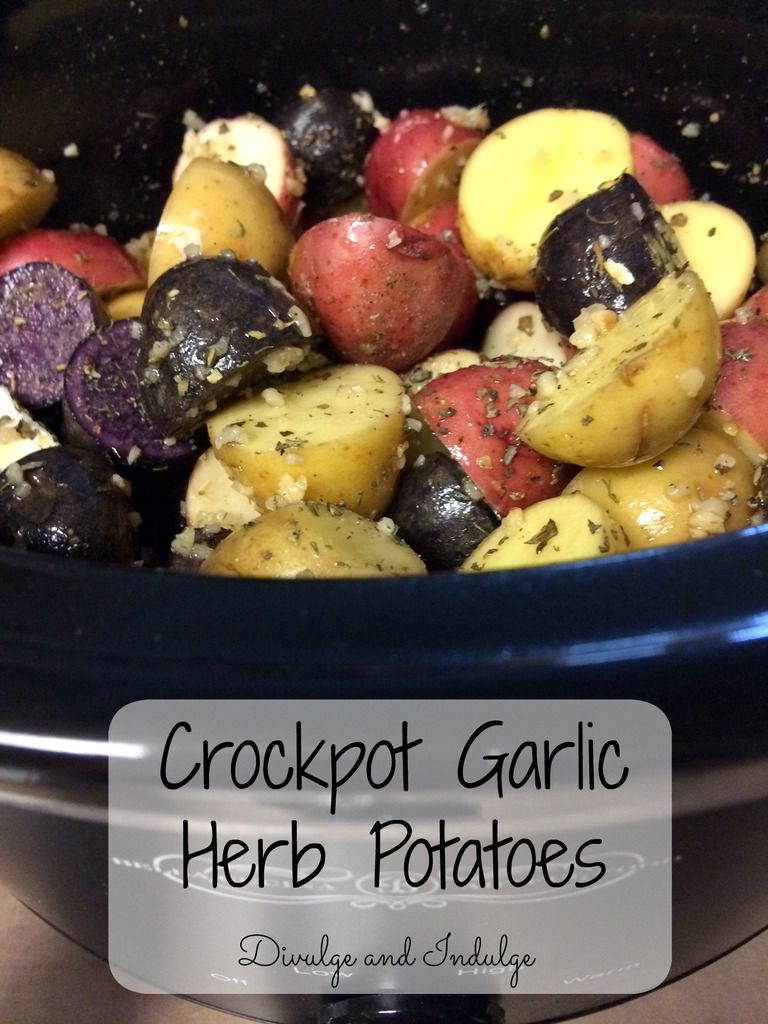
Tasty Tuesday: Crockpot Garlic Herb Potatoes

As I mentioned in my last post, I've been struggling with finding my motivation. Motivation for working out, motivation for blogging, motivation for, well, pretty much everything.

I think most people get in these weird slumps from time to time, and last week I decided to just say, "Fuck it" and take some time away from the things I felt like I had to do. (And you'll see exactly how little I cared by the end of the month when I post my goals and results!)

Instead of working on blog posts, I watched countless hours of Dexter with Eric. (And yes, we've both seen it before. We randomly decided to start the series over from the beginning a few weeks ago because we both love it so much.) Instead of stressing about finding time and energy for a workout, I did yoga videos when I felt like it and didn't worry about how hard I was pushing myself.

I'd like to say that I'm completely relaxed and centered now, and that I'm ready to get back into the groove of things ... But that's not exactly true. I'm slowly getting there, but it's definitely a process.

I realize that introduction probably doesn't seem like it has anything to do with a recipe, but it actually kind of does. One thing I struggle with when I lack motivation is the inspiration to try new things in the kitchen. I either want to go the ridiculously easy route (i.e. frozen pizza, pasta and jarred sauce, grilled chicken breasts, etc.) or, if I'm really unmotivated to throw together a meal, I resort to going out or getting takeout. 

I went a little crazy with eating out last month, and the result was an emptier wallet and tighter pants. Remember how I lost two pounds in January and another two pounds in February? Well, two of those pounds found their way back after I spent the entire month of March stuffing my face with Qdoba, chocolate, gyros from my favorite Greek place, pancakes, potato chips ... The list could go on and on. The point is, I stopped caring about making stuff at home and am now regretting some of those choices.

But anyway ... There will be plenty of time to talk about that in an upcoming post. 

Today's post is all about one of the recipes I made early last week that kind of helped me get my groove back in the kitchen.

 photo CrockpotGarlicHerbPotatoes1_zpstcbk0b8k.jpg

I struggle with coming up with interesting side dishes. 98% of the time I stick with things like Steamfresh vegetables, salads, and rice. While those are all fine, I get sick of having the same thing all the time.

The only problem is that I never really feel like putting much effort into side dishes. In general, I don't love spending hours in the kitchen, but I'm much more willing to put in some extra time and effort for a main dish than for a side.

But, since I wanted to start trying new recipes again, I thought a simple side dish might be a good start. So I spent some time searching Pinterest and found this recipe. I tweaked things a bit, but it's essentially the same basic idea.

Honestly, I had no idea how these potatoes would turn out. I worried that they'd either get too mushy or wouldn't cook completely. But they were actually really good!

This isn't a fancy side dish ... Not at all. Sometimes, though, keeping things simple is best. And this combination of potatoes, garlic, butter, olive oil, and herbs is the perfect compliment to a meal.

Crockpot Garlic Herb Potatoes

Adapted ever so slightly from a recipe on Damn Delicious.

Ingredient List:
  • 3 lbs small potatoes, halved (I used a combination of red, purple, and yellow baby potatoes.)
  • 3 tbsp olive oil, divided
  • 2 tbsp unsalted butter
  • 4 cloves garlic (or, if you're lazy like me, the equivalent of jarred, pre-minced garlic)
  • 1 tsp basil
  • 1 tsp oregano
  • 1 tsp black pepper
  • 1 tsp garlic salt
  • 1/2 tsp dill

Instructions:

1.  Spray the inside of the crockpot with cooking spray.

2.  Add the halved potatoes, 2 tbsp olive oil, butter, garlic, basil, oregano, dill, and black pepper to the crockpot and mix well.

3.  Cook on low for 4-5 hours or high for 2-3 hours. (I checked my potatoes often, and, after starting them on high, switched to the low setting. I cooked them on high for 1.5 hours and then finished them on low for 2 hours. I felt like this gave me the slightly softened yet not at all mushy texture I was going for. I highly suggest checking the potatoes several times as they cook ... The cook time may differ depending on their size.)

4.  After the potatoes have cooked for about 2 hours, add the remaining 1 tbsp olive oil. This is completely optional, but I thought my potatoes seemed like they weren't completely covered in oil and butter and I worried that they might dry out if I didn't add a little more. I opted to add oil, but you could always add more butter if you prefer.

5.  At the end of cook time, add the garlic salt (or you can use regular salt if you think that's too much garlic!), and stir the potatoes several times.

Although I felt like I needed to check my potatoes regularly to ensure they didn't overcook, I still thought this was a really simple recipe. It was also a nice change from the usual steamed vegetables or salad (though definitely not as healthy!).

It probably sounds silly, but after I made these potatoes, I started feeling more excited about trying new recipes again. I guess sometimes the simplest things can work to get you back on track!

Tuesday, March 1, 2016

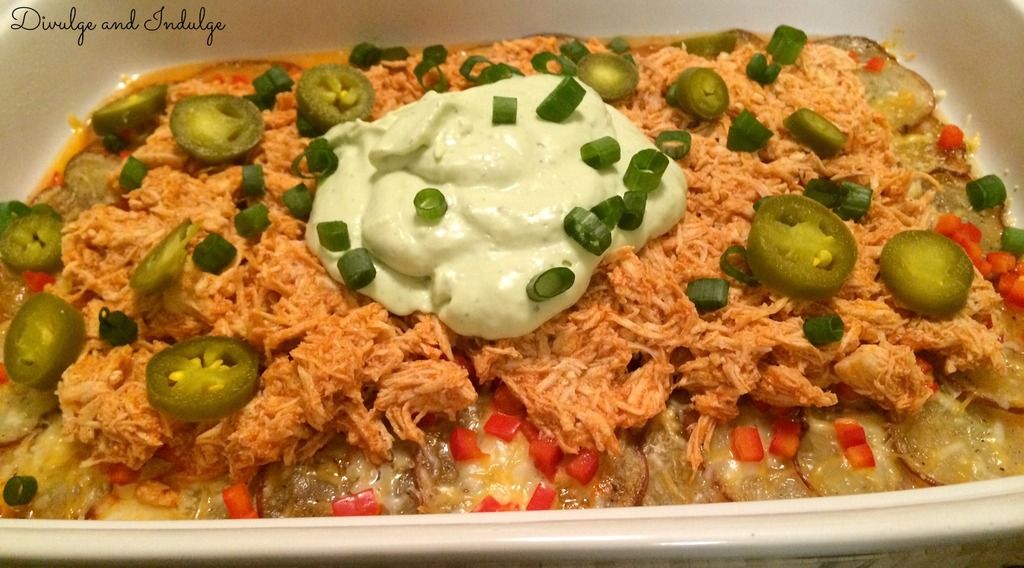
Tasty Tuesday: Buffalo Chicken Potato Nachos with Avocado Ranch Sour Cream

Although Eric and I have mostly been trying to make healthier food choices, we said "fuck it" multiple times during the month of February. Since we were both sick, we felt justified in making things with heavy cream (like these Red Garlic Mashed Potatoes and this One Pot Tortellini with Italian Sausage in a Tomato Cream Sauce). We also made brownies (twice) and just seemed to eat more "bad" food in general.

Today's recipe is a perfect example of what I mean when I say we've been eating more "bad" food.

 photo BuffaloChickenPotatoNachoswithAvocadoRanchSourCream1_zps4jiva9m7.jpg
I'm a huge fan of buffalo chicken, and I've been craving it a lot for the past couple of months. I've also been seeing a lot of potato nacho recipes floating around on Pinterest and various blogs, so I spent some time trying to figure out the best way to combine a basic potato nacho recipe with buffalo chicken.

I'm not going to lie: this recipe isn't perfect. Eric thinks that maybe next time we should try grilling the chicken and dicing it up. The shredded chicken from the crockpot was really juicy, which was nice ... However, it retained a little more moisture from the chicken broth it was cooked in than we would have liked, and the result was a slightly thinner buffalo sauce and potatoes that lost some of their crunch after the chicken had been sitting on top for a while.

That being said, the overall result was very good. (Obviously good enough to post here!) The flavor was almost exactly what I had imagined when I first started figuring out how I could make these nachos. This kind of recipe is also very versatile, so it would be pretty easy to switch up the meat (or method of cooking the meat), toppings, and flavors. Eric and I both really loved these nachos (we seriously ate the entire pan that you'll see pictured below in one sitting!), and this is the kind of thing I'd want to make if we were going to have a small group of people over. (It's not really enough to feed a large group unless you doubled or tripled the recipe. Or maybe we just eat a lot. Haha.)

 photo BuffaloChickenPotatoNachoswithAvocadoRanchSourCream2_zpsisslcukk.jpg
One final thing before I share this recipe: these nachos were spicy. I was honestly surprised that Eric liked them so much because even I thought they were pretty spicy, and my spicy food tolerance is much higher than Eric's. I'm posting this recipe exactly as I made it, but I'd highly recommend using less hot sauce and/or omitting the jalapeños if you (or someone you'd be making these for) don't love super spicy foods.

Buffalo Chicken Potato Nachos with Avocado Ranch Sour Cream

Adapted from a recipe on Real House Moms.

Ingredient List:
  • 2-3 boneless, skinless chicken breasts (I used 2 large breasts.)
  • 7-10 small to medium red skin potatoes (I used 7 or 8, and that was more than enough for us. You can also use 1 large or 2 smaller russet potatoes if you're not a huge fan of the red skin potatoes.)
  • 1 1/4 cups shredded cheese (I used a cheddar jack blend.)
  • 1 red bell pepper, diced
  • 2 tbsp unsalted butter
  • 1 cup hot sauce (I used Frank's Red Hot.)
  • 1 avocado
  • 1 packet dry ranch dressing mix
  • 1 cup sour cream
  • 1 tsp garlic salt
  • 1 tsp black pepper (plus additional to taste)
  • Sea salt to taste
  • Olive oil (I didn't measure how much I used, but I just tossed the potatoes in a little olive oil, sea salt, and black pepper before the initial cook time, so use the amount you feel is best based on the amount of potatoes you're using.)
  • Toppings (optional): diced green onions, sliced pickled jalapeño peppers, fresh diced tomatoes, extra cheese, extra avocado, etc.

Instructions:

1.  If you're cooking your chicken in the crockpot, spray the inside of the crockpot with cooking spray. Add the chicken breasts, garlic salt, 1 tsp black pepper, and enough liquid (I used chicken broth, but you could also use water) to cover the meat. 

2.  Cook on low for 6-8 hours or high for 3 hours. When the chicken has finished cooking, shred it with two forks and remove it to a medium bowl. (You can also grill or pan fry your chicken and dice it into small chunks, or you could shred a rotisserie chicken. I'll probably try grilling my chicken next time.)

3.  Preheat the oven to 425 degrees.

4.  Slice the potatoes into medium thick slices (between 2.5-3.5 mm thick). I used a mandolin to do this, and, while it's not absolutely necessary, it's a great tool to get slices of consistent size/thickness. It's also so much easier and faster than trying to slice small potatoes with a knife. (At least in my opinion!) This is also how I know the actual thickness of the slices ... If I'd just been eyeballing it, I wouldn't know that they were between 2.5-3.5 mm!

5.  Line a baking sheet with aluminum foil and spray with cooking spray. (I actually had to use a total of three baking sheets for this recipe because there were so many potato slices.) 

6.  Toss the potato slices in a little olive oil, sea salt, and black pepper, then arrange the potatoes on the baking sheet(s) in a single layer.

7.  Bake the potatoes for 10 minutes, then flip the potatoes and bake for an additional 5-10 minutes. (The total cook time will depend on how thin the potatoes are. I baked mine for the full 20 minutes, but I checked on them after 15 to make sure I didn't overcook them.)

8.  Coat a baking dish with cooking spray, and pile the potatoes together in the dish. Cover with the shredded cheese and diced red bell peppers, and return them to the oven to bake for an additional 5-6 minutes (or until the cheese has melted and the peppers have softened slightly).

9.  While the potatoes are baking for the final time, melt the unsalted butter in a microwave safe bowl. Add the hot sauce to the butter, and mix thoroughly.

10.  Pour the buffalo sauce over the chicken in a medium bowl. Toss several times to coat the chicken thoroughly.

11.  Add the avocado, sour cream, and dry ranch dressing mix to a food processor and blend until everything is completely mixed.

12.  When the potatoes have finished baking, remove the baking dish from the oven and set aside. Top the potatoes with the buffalo chicken, a generous dollop of the avocado ranch sour cream, and any additional toppings you would like to use (as you can see from the pictures, we used diced green onions and sliced pickled jalapeño peppers).

I know this seems like a lot of steps, but it's really not a difficult recipe. And, honestly, the cleanup was the one thing that took the most time. Everything else goes pretty quickly, especially after the chicken is cooked and the potatoes are sliced. (And the mandolin made slicing the potatoes feel ridiculously easy and quick.)

I don't know how well this reheats since we ate that entire pan in one sitting (I should probably be a little more embarrassed of this fact, but I'm not). I assume that since we had some slight issues with the chicken retaining a little too much moisture from the crockpot, the leftovers may have been a little soggy.

If you don't think you can eat this much in one sitting, you may want to cut down the recipe or use a different cooking method for the chicken. You could also try not adding any toppings (including the meat) to the potatoes until the potatoes have been placed on your plate, and then store the leftover potatoes and leftover toppings in separate containers.

Tuesday, September 8, 2015

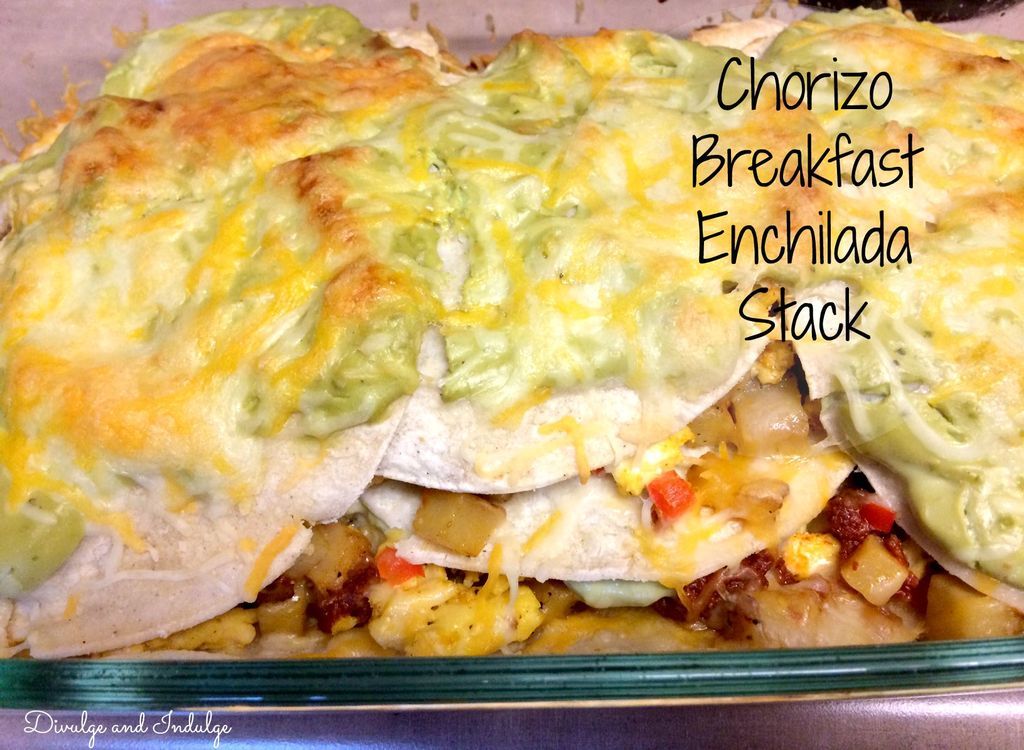
Tasty Tuesday: Chorizo Breakfast Enchilada Stack

I really hate that I wasn't able to get a great picture of this meal because it tastes so much better than the photo below would have you believe.

 photo ChorizoBreakfastEnchiladaStack_zpsoslxto1e.jpg

I have to admit, though, that this wasn't my original vision.

When I first started thinking about some new recipes to try, I decided I would come up with a breakfast enchilada dish. Breakfast burritos are one of my absolute favorite things, so making a few simple changes to transform a burrito into an enchilada seemed like an easy and obvious thing to do.

Unfortunately, it wasn't as easy as I initially thought.

I make enchiladas pretty regularly, and I've never had the issues I had when I was trying to make this meal. 

When I first started rolling the corn tortillas around my filling, everything was fine ... And then they started cracking and spilling shit everywhere. I made it through about 4 enchiladas before I decided I should probably rethink my original plan and come up with something else.

And so this breakfast enchilada stack was born.

Like I said, it's not the prettiest dish. The corn tortillas weren't immune to cracking even after I decided to stack them instead of roll them. I made a ton of filling, so it's kind of spilling out the sides (and I still had some left over that I used for burrito bowls!). And I can never seem to make any avocado sauce look appetizing in pictures (even though it always tastes amazing). 

But you know what? I'm proud of this meal. I'm proud because I came up with a recipe using my knowledge and experience, and, when it didn't work out the way I wanted it to, I managed to figure out a way to save it. 

Is this the best food picture I've ever shared on my blog? Absolutely not. Hopefully you can overlook the less than perfect photo, though, and see this meal for what it is: spicy, flavorful, filling, and delicious.

Chorizo Breakfast Enchilada Stack

A Divulge and Indulge original recipe. (Sauce adapted from a recipe on Gimme Some Oven.)

Ingredient List:
  • 0.75 lb chorizo sausage
  • 1 large red bell pepper, diced
  • 4 small Yukon Gold potatoes, peeled and diced into very small (about 1 inch) chunks
  • 1 medium red onion, diced
  • 6 eggs
  • 1 tbsp milk (I used 1%.)
  • 1 medium jalapeño pepper (You don't need to chop this since it will be going in the food processor, but if you don't want the sauce to be very spicy, you should cut it enough to remove some of the seeds.)
  • 2 avocados
  • 1 lime
  • 2 tbsp low fat margarine or butter (I used low fat margarine.)
  • 2 tbsp flour
  • 1 cup chicken broth
  • 1 cup sour cream (I used low fat, and it worked well.)
  • 15 corn tortillas (soft taco size)
  • 1 1/2 cups shredded Mexican blend cheese (I used Sargento 4 Cheese Mexican blend.)
  • 1 tsp cilantro
  • 1 tbsp olive oil
  • 1 tsp sea salt
  • 3 tsp black pepper, divided
  • 4 tsp garlic salt, divided

Instructions:

1.  Preheat the oven to 425 degrees.  

2.  Heat the olive oil in a large skillet over medium heat.

3.  Add the diced potatoes and red onion to the skillet and season with 2 tsp garlic salt and 2 tsp black pepper. Cook over medium heat until the potatoes and onions have softened a bit and the potatoes start to brown.

4.  Crumble the chorizo sausage into a separate medium skillet. Cook over medium heat until completely browned.

5.  Once the potato/onion mixture and chorizo sausage have finished cooking, mix them together in a large bowl and set aside.

6.  Wipe out the large skillet that previously held the potato/onion mixture, spray with cooking spray, and place back over medium heat.

7.  Crack the eggs into a medium dish with a lid (I usually just use a Tupperware dish), and add the diced red bell pepper, sea salt, and remaining 1 tsp black pepper. Cover and shake vigorously, then pour the mixture into the large skillet.

8.  Pour the milk into the egg mixture and continue to cook over medium heat, scrambling with a spoon or spatula. 

9.  Once the eggs have finished cooking, transfer the egg mixture into the large bowl with the potato/onion mixture and chorizo sausage. Stir to combine and set aside.

10.  Melt the butter in a small saucepan.

11.  Add the flour, then slowly pour in the chicken broth, stirring well to get rid of any lumps.

12.  Bring this mixture to a boil, then reduce heat to medium low. Allow the sauce to simmer for approximately 5 minutes, stirring often.

13.  Add the sour cream, cilantro, and remaining 2 tsp garlic salt to the sauce. Stir well to combine.

14.  Add the avocados and jalapeño pepper to a food processor, blending until fairly smooth. (It's okay if there are some lumps at this point.)

15.  Slowly pour the sauce into the food processor, blending with the avocados and jalapeño pepper until smooth and creamy. (Be very careful blending hot liquid in a food processor! Make sure you open the lid regularly to allow heat to escape!)

16.  Squeeze the juice from the lime into the sauce, and pulse a few more times until everything is thoroughly mixed.

17.  Spray a 9x13 inch pan with cooking spray.

18.  Place 6 corn tortillas across the bottom of the pan, then cover with about 1 1/2 cups of the filling from the large bowl, about 1/2 cup of the Mexican blend cheese, and about 1/2 cup of the avocado cream sauce. (These amounts are approximate. I didn't actually measure out how much I used between each layer, so just use your best judgment.) 

19.  Stack 3 corn tortillas across the center of the filling/cheese/sauce mixture, and add more filling, cheese, and avocado cream sauce.

20.  Place the last 6 corn tortillas across the top of the center layer and finish off with the remaining cheese and avocado cream sauce.

21.  Bake for 20-25 minutes, or until the cheese has completely melted.

I know this probably looks like a lot of ingredients and a lot of work (and it kind of is). But trust me ... It's well worth it! If you're also a huge fan of breakfast burritos, you should definitely give this a try!

Tuesday, April 7, 2015

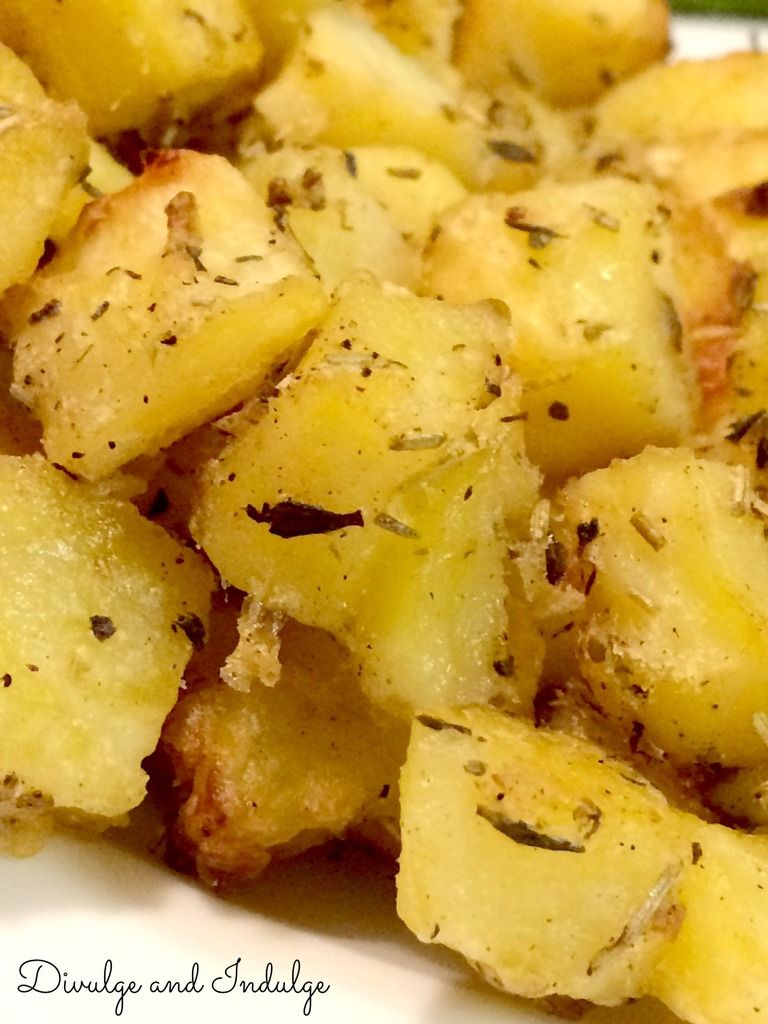
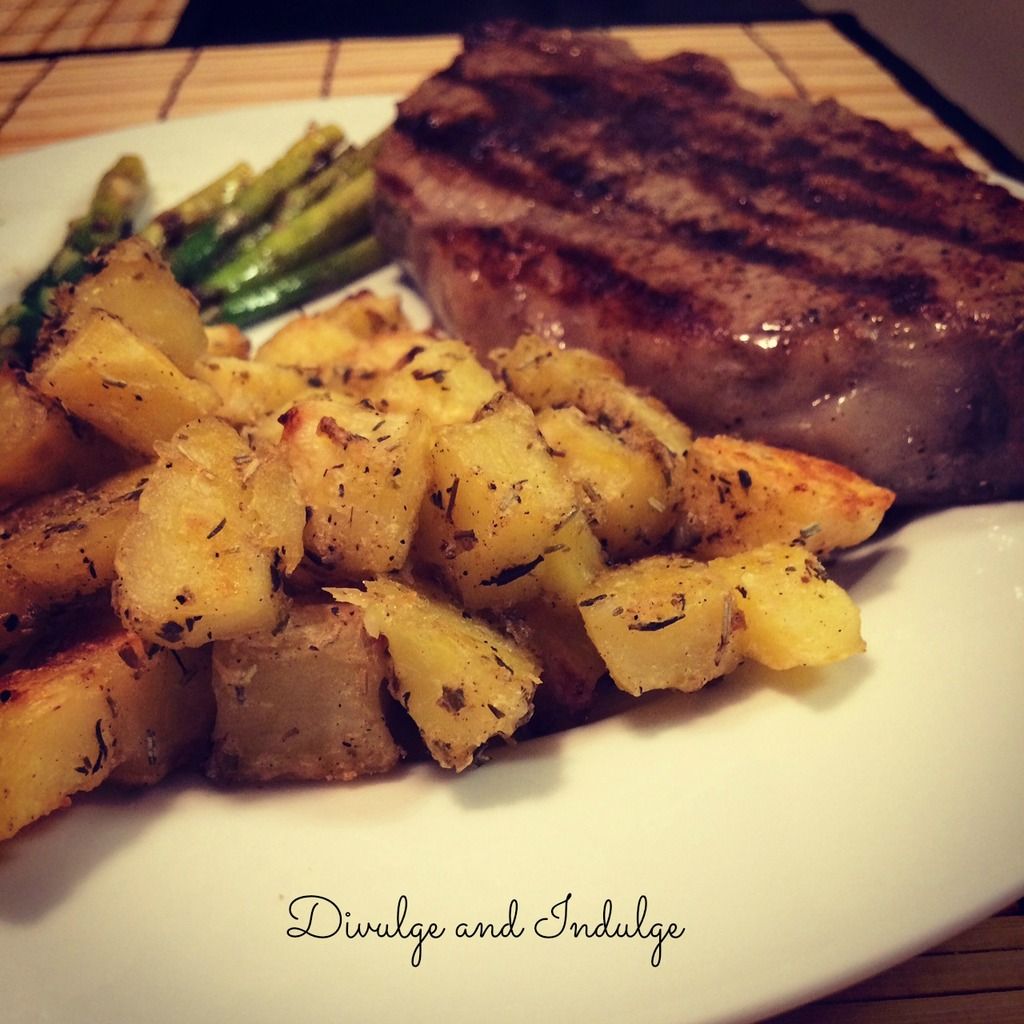
Tasty Tuesday: Lemon Herb Roasted Potatoes

There's a little Greek place here in Omaha that Eric and I love. It's a family run restaurant that features simple but delicious specialties. We always start with the dolmades (stuffed grape leaves), and I almost always order the gyro platter, which comes with a side salad and the most amazing potatoes.

 photo LemonHerbPotatoes1_zpsiyrulixt.jpg
This is such a simple recipe, but it's so good!

Since I first tried those potatoes several years ago, I've been looking for a recipe that might produce something similar. I knew I'd never replicate them exactly, but I was sure that I could make something comparable if I could figure out which spices they used. (All I knew for sure was lemon, oregano, salt, and pepper.) And since I rarely make side dishes that are more elaborate than steamed vegetables or a salad, I thought it would probably be a good thing to have a recipe like this available. Sometimes you want something different, you know?

A few weeks ago I was searching Pinterest for some side dish ideas, and I saw a recipe for lemon herb roasted potatoes. When I followed the link and read through the recipe, I got really excited because I thought they might taste a little like the Greek potatoes I love so much.

I'm happy to say that I was right! While they don't taste exactly the same, the flavors are very similar. And, most importantly, these potatoes are delicious.

 photo LemonHerbPotatoes2_zpsbepzkkyf.jpg
I know I already posted this picture on Instagram, but I wanted to include it here as well. This was such an awesome meal!


Lemon Herb Roasted Potatoes

Adapted ever so slightly from a recipe on Rock Recipes.


Ingredient List:
  • 8-12 medium Yukon Gold potatoes, peeled and diced into very small (about 1 inch) chunks
  • 1 lemon
  • 2 tbsp olive oil
  • 2 tsp garlic salt
  • 2 tsp black pepper
  • 2 tsp oregano
  • 2 tsp rosemary
  • 2 tsp thyme
Instructions:

1.  Preheat the oven to 375 degrees.

2.  Bring a large pot of salted water to a boil. 

3.  Parboil the potatoes for 3-5 minutes. (If you don't know what that means, don't feel bad ... I didn't either. After consulting with Google, I found that "parboil" is just a fancy term for boiling something until it has barely softened.) I would strongly suggest sticking close to the pot while the potatoes are cooking to ensure they don't get too soft. 

4.  Drain the potatoes and place them in a medium bowl. Let them stand for 5 minutes.

5.  Squeeze the juice from the lemon into the potatoes, tossing several times so that the potatoes absorb the juice (they should begin to soften a little more as they soak up the juice).

6.  Add the garlic salt, black pepper, oregano, rosemary, and thyme. Stir to combine.

7.  Pour in the olive oil, stirring to coat the potatoes as evenly as possible. (The potatoes will be much softer at this point, which is why it's very important not to boil them too long in the first step!)

8.  Line a cookie sheet with aluminum foil and spray it with cooking spray.

9. Place the potatoes in a single layer across the lined cookie sheet and bake for 1 hour, or until they begin to get crispy on the outside. (The original recipe recommends turning them every 20 minutes, but I didn't. I would recommend checking them every 20 minutes or so to make sure they aren't sticking, though.)

These potatoes are seriously amazing: crispy on the outside and buttery soft with a burst of lemon and herb flavor on the inside. They were the perfect side for the steak Eric grilled a couple of weeks ago. I'll definitely be making these again soon!

Tuesday, March 24, 2015

Tasty Tuesday: Chorizo Potato Enchiladas with Green Chile Sour Cream Sauce

When I shared the results of my monthly personal challenge for February, I promised I'd post my (somewhat) original recipe in my next Tasty Tuesday post. Then I moved to Blogger and spent 2 weeks tweaking everything and that post never happened.

Today I'm making up for that, though. And, as an added bonus, I'm also sharing what I did with the leftover filling. It's not a new concept by any means, but it's a slight variation of one of our favorite quick weeknight meals (also known as what I do when I've forgotten to plan for anything else and don't feel like making a frozen pizza or getting takeout).

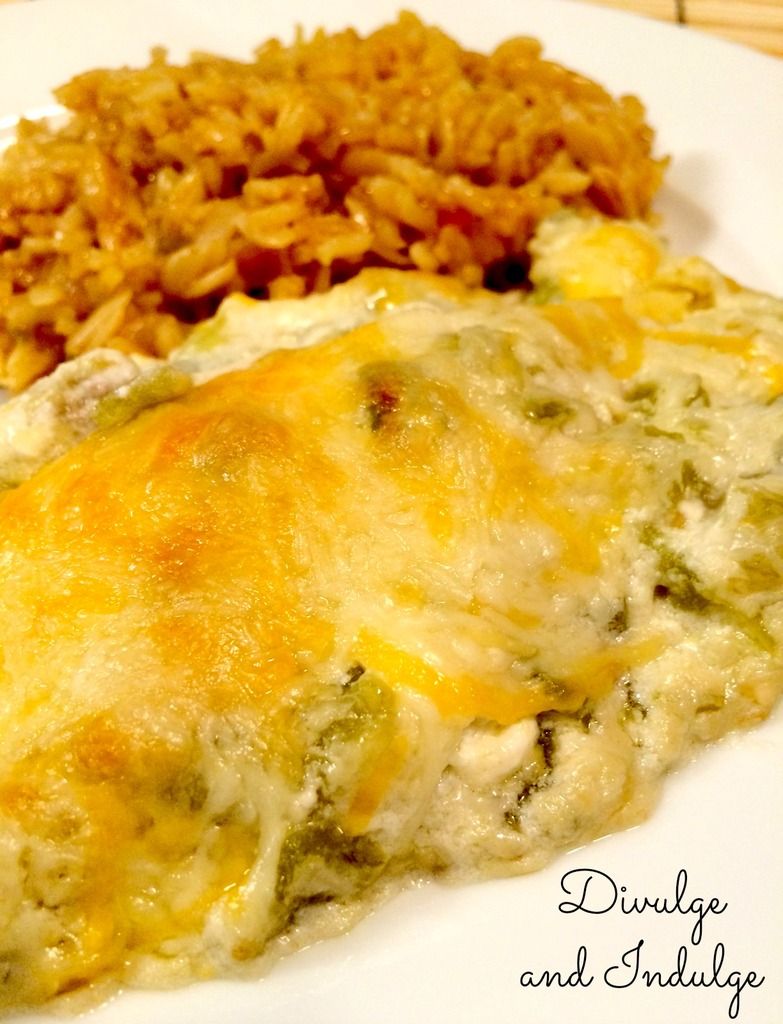
 photo ChorizoPotatoEnchiladas_zpsexqpeeqj.jpg
I couldn't get a great picture of these enchiladas, but trust me ... They're delicious!


I realize that from this picture these enchiladas look almost identical to the chicken enchiladas I posted a long time ago, but I promise that the sauce is the only thing that's the same. I'd never had chorizo potato enchiladas with anything other than a red sauce, so I decided to take a risk and use this amazing sauce instead. And it was phenomenal! The flavors of the chorizo and potatoes paired wonderfully with this green chile sour cream sauce. So well, in fact, that Eric kept complimenting the meal as he devoured the enchiladas on his plate.

Don't just take my word for it, though. Try these enchiladas for yourself ... You won't be disappointed!


Chorizo Potato Enchiladas with Green Chile Sour Cream Sauce

A Divulge and Indulge original recipe. (Sauce adapted from a recipe on Taste and Tell.)


Ingredient List (Filling):
  • 3 medium Yukon Gold potatoes, peeled and diced into very small (about 1 inch) chunks
  • 0.75-1 lb chorizo sausage (I used 0.75 lbs, and that was plenty)
  • 1 tbsp olive oil
  • 1 cup white onion, diced 
  • 1/2 cup black beans, rinsed and drained
  • 1/2 tsp garlic salt
  • 1/2 tsp black pepper
  • 1/2 tsp chipotle chili powder
  • 1/2 tsp Mexican oregano

Instructions (Filling):

1.  Heat the olive oil in a large skillet over medium heat.

2.  Add the diced potatoes and onions to the skillet and season with the garlic salt, black pepper, chipotle chili powder, and Mexican oregano. Cook over medium heat until the onions and potatoes have softened a bit and the potatoes have started to brown.

3.  Crumble the chorizo sausage into the skillet with the potatoes and onions, cooking until completely browned.

4.  Stir in the black beans, and allow the mixture to cook for approximately 2 minutes (or until completely warmed through).


Ingredient List (Enchiladas):
  • 10 corn tortillas (soft taco size)
  • 2 cups shredded Mexican blend cheese (I used Sargento 4 Cheese Mexican blend, which, according to the package, includes Monterey Jack, Cheddar, Queso Quesadilla, and Asadero cheeses)
  • Cooked chorizo and potato mixture (from recipe above)

Instructions (Enchilada Assembly):

1.  Preheat the oven to 425 degrees.

2.  Spray a 9x13 inch pan with cooking spray.

3.  Warm the corn tortillas in the microwave (I zapped mine for 15-20 seconds) to make them more pliable.

4.  Place a tortilla on a plate and fill it with some of the cooked chorizo and potato mixture and some of the shredded cheese.

5.  Roll the tortilla around the filling and place it seam side down in the 9x13 inch pan. Repeat steps 4 and 5 until you've used all of your tortillas, taking care to place an equal amount of filling in each tortilla.


Ingredient List (Green Chile Sour Cream Sauce):
  • 3 tbsp low fat margarine or butter (I used low fat margarine)
  • 3 tbsp flour
  • 1 1/4 cups chicken broth
  • 1 cup sour cream (I used light sour cream to try to lighten the recipe up a bit, and it worked just as well as regular sour cream)
  • 2 4 oz. cans diced green chilies

Instructions (Green Chile Sour Cream Sauce):

1.  Melt the butter in a small pan.

2.  Stir in the flour and whisk for approximately 1 minute.

3.  Slowly whisk in the chicken broth and cook over medium heat until thickened and no lumps remain.

4.  Stir in the sour cream and green chilies until well combined.

5.  Pour the sauce over the pan of enchiladas and top with the remaining shredded cheese.

6.  Bake the enchiladas for 20-25 minutes, or until the cheese is melted and bubbly.

As I said earlier, you'll likely have leftover filling unless you stuff your enchiladas to the point of bursting or opt to make multiple pans of enchiladas (and, if you do that, you'll definitely need to double or triple the sauce recipe!). As I also said, we weren't exactly creative with our leftovers. 

I'm going to share what we did anyway, though, because the result was a delicious, simple meal that not only used up the leftover filling but also the leftover black beans (I used canned black beans and I saved the remaining beans after measuring out 1/2 cup for the enchilada filling). I hate wasting food, so it made me happy to avoid throwing anything out!

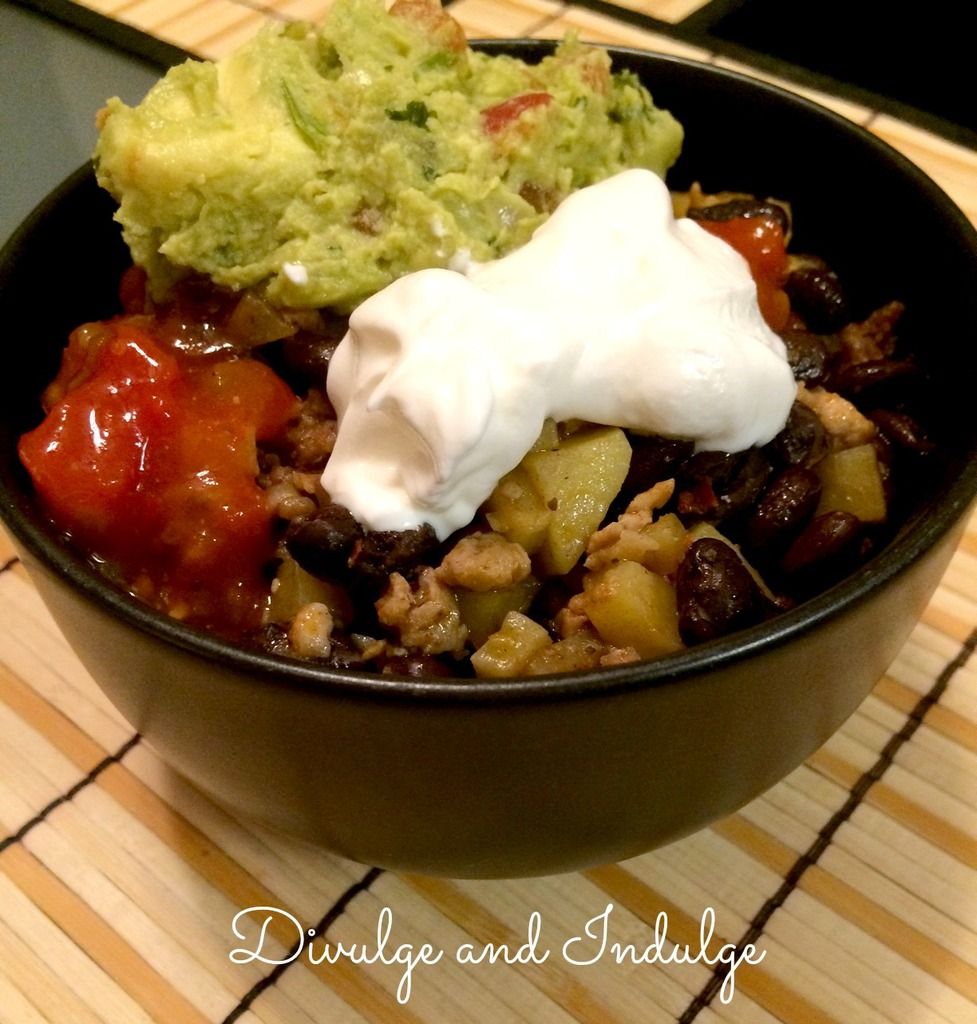
 photo ChorizoPotatoBowl1_zpsfwczivry.jpg
This is so good, you don't even realize you're eating leftovers!


Burrito bowls are a favorite lazy night meal in our house. Sometimes we brown some ground beef or turkey or grill some chicken and mix that with black beans, onions, green chilies, and spices. Sometimes we omit the meat completely and just have vegetarian burrito bowls. And sometimes we make burrito bowls in order to use up leftover enchilada or burrito filling. No matter the version, burrito bowls are always a hit with us!


Chorizo Potato Burrito Bowls

A Divulge and Indulge original recipe.


Ingredient List:
  • Leftover filling from the Chorizo Potato Enchiladas with Green Chile Sour Cream Sauce (from recipe above)
  • 1 1/4 cups black beans, rinsed and drained
  • 2 cups cooked rice (I used basmati because that's what we had on hand)
  • Shredded cheese for serving (I used the same 4 cheese Mexican blend I used in the enchiladas)
  • Sour cream for serving
  • Salsa for serving
  • Guacamole for serving

Instructions:

1.  Mix the black beans together with the leftover chorizo and potato filling and heat until completely warmed through. (I honestly just microwaved ours for about 3 minutes and it tasted great, but you could also dump everything into a pan and cook it on the stovetop if you prefer that method.)

2.  Spoon rice into a bowl and top with the black beans and filling.

3.  Top with shredded cheese, sour cream, salsa, and guacamole.

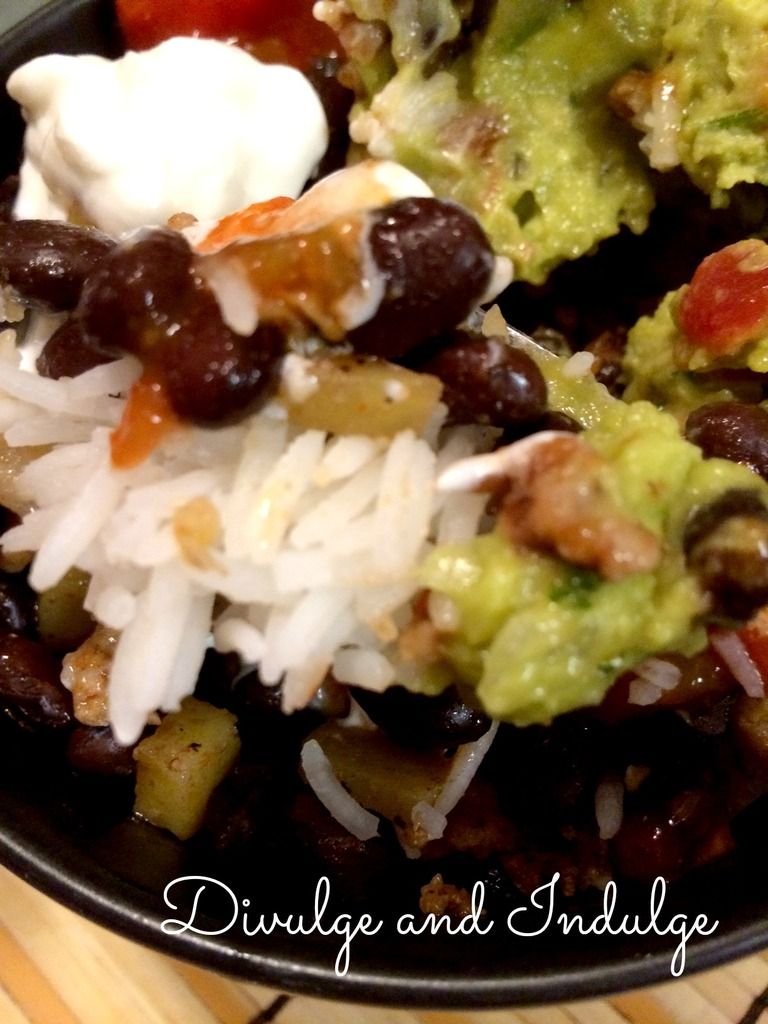
 photo ChorizoPotatoBowl2_zpsaay9kbiq.jpg
I just had to add another picture to show off all the layers in the burrito bowl.


Burrito bowls are seriously simple meals that taste amazing. If you're a fan of Chipotle and/or Qdoba burrito bowls, this is a great way to get your fix without spending $8.00 (or however much they are these days since I can't remember right now).

Tuesday, February 3, 2015

Tasty Tuesday: Grilled Steaks with Gorgonzola Cream Sauce and Red Garlic Mashed Potatoes

Eric and I really aren't Valentine's Day people, but that doesn't mean I can't appreciate the fact that for many couples, the month of February is associated with love and romance.  (Or, if not the entire month, at least February 14th is associated with those things.)

Because of this, I'm going to be writing more posts that fall under the "Love and Relationships" category this month.  Not all of my posts will be related to this topic (I mean, yesterday's post obviously wasn't), but there will probably be a few more posts than usual on those subjects.

Today's post is no different.  While I'm sticking with my usual "Tasty Tuesday" post, I'm going to be sharing a couple of recipes that are ideal for a romantic night in.  (Assuming, of course, that you want to avoid the crowds and the inflated Valentine's Day menu prices.)

Eric and I made this meal together a couple of weeks ago, though it wasn't for a special occasion.  After eating it, though, we were both impressed with ourselves and agreed that it was almost like we were eating at a nice restaurant at a fraction of the cost.

At that moment, I decided I'd save it to post around Valentine's Day.  It's perfect because while it seems fancy, it's really easy to make.  It also comes together fairly quickly, so you won't find yourself slaving away in the kitchen for hours.

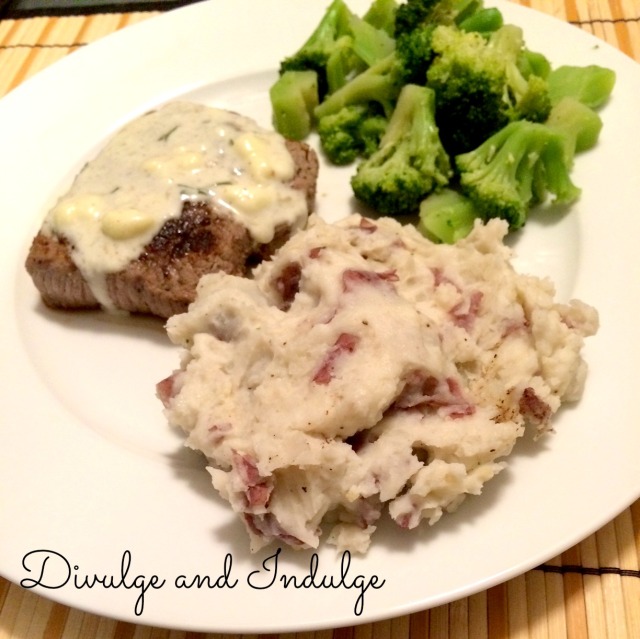
GorgonzolaSauce1
I wish the lighting had been better when I took these pictures, but you can at least get the idea.


I don't think I've ever shared two recipes in one Tasty Tuesday post before, but since both of these are so simple and they pair so well, I figured what the hell.  It seemed like a good idea, and hopefully it will help at least a few people who are struggling with ideas for a home cooked Valentine's Day dinner.  (Or, if you're like us, maybe it will just inspire you to do something a little different with the usual "steak and potatoes" dinner.)

Grilled Steaks with Gorgonzola Cream Sauce

Adapted ever so slightly from a recipe on Tasty Kitchen.


Ingredient List:
  • 2-4 steaks (We only used 2, but this recipe will definitely make enough sauce to cover 4 steaks.  We used sirloin steaks, but you can use whatever type of steak you like for this recipe.)
  • 1/2 cup heavy cream
  • 4 oz. crumbled gorgonzola cheese
  • 1/3 cup shredded Parmesan cheese
  • 1/2 tsp dried parsley
  • 1/8 tsp ground nutmeg

Instructions:

1.  Grill the steaks to your desired level of doneness.  I won't detail how to grill a steak in this post because it's one of those things that most people already know how to do (and everyone has their preferred method).  We simply used our little George Foreman grill and they turned out beautifully.  I will say, though, that Eric lightly rubbed our steaks with a little garlic salt and black pepper before throwing them on the grill.  Please note that gorgonzola cheese is very salty, so make sure you don't use too much salt in your rub!

2.  Add the heavy cream, gorgonzola cheese, Parmesan cheese, dried parsley, and ground nutmeg to a small saucepan.

3.  Allow the ingredients to simmer over medium heat, whisking continuously until the cheeses are mostly melted.  (It took about 5 minutes for the cheese to melt in my sauce, and, as you can see from my pictures, there were still a few lumps of gorgonzola.  I was worried about that at first, but the picture from the original recipe I used showed sauce with a few lumps as well, so it's obviously normal.)

4.  Spoon the sauce over the steaks and serve warm.

I mixed some of the sauce into my potatoes after I took these pictures, and it was a fantastic combination!


Red Garlic Mashed Potatoes

Adapted ever so slightly from a recipe on Allrecipes.


Ingredient List:
  • 8-10 medium red potatoes, cubed
  • 2 garlic cloves (or, if you're lazy like me, the equivalent of jarred, pre-minced garlic)
  • 1/2 cup unsalted butter
  • 1/4 cup heavy cream
  • Garlic salt to taste (I used quite a bit, but I didn't measure it out.  I basically just added some, tasted, added more, tasted, and so on until it was to my liking.)
  • Black pepper to taste (Again, I used quite a bit, but I didn't measure it out.  I also just added/tasted until the potatoes had the flavor I wanted.)

Instructions:

1.  Place the cubed potatoes in a large pot and fill the pot with enough water to completely cover all of the potatoes.  Bring the water to a boil and allow the potatoes to cook until fork tender (about 10 minutes).

2.  Drain the potatoes, then place them in a large bowl.  You can use a hand mixer if you like, but I used my KitchenAid Stand Mixer (I used the flat beater attachment.)

3.  Add the butter, then gently beat to combine.

4.  Stir in the minced garlic and gently beat to combine.

5.  Pour in the heavy cream, gently beating to combine.  (As you can see, you'll want to mix the ingredients with each addition.)

6.  Add garlic salt and black pepper to taste.  (I beat the potatoes gently after each addition here as well to ensure everything was well blended.  Again, make sure you taste after adding the spices to determine how much you need.)

Pair these two things with a salad or vegetable (I made steamed broccoli, as you can see from the pictures) and a glass of wine, and you've got a delicious, flavorful, restaurant quality meal.  This was seriously one of the best things I've ever made at home, and, as I said earlier, it would be perfect for Valentine's Day (or any other day when you want to wow your significant other with an amazing dinner)!

Tuesday, October 7, 2014

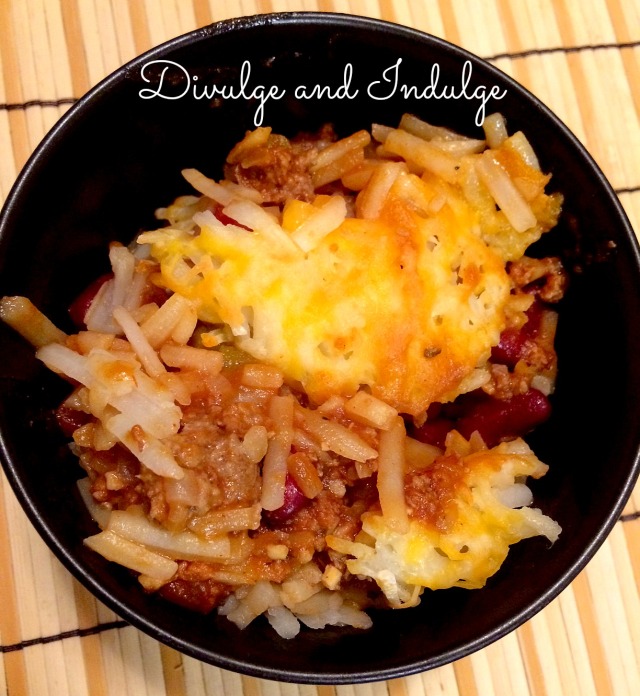
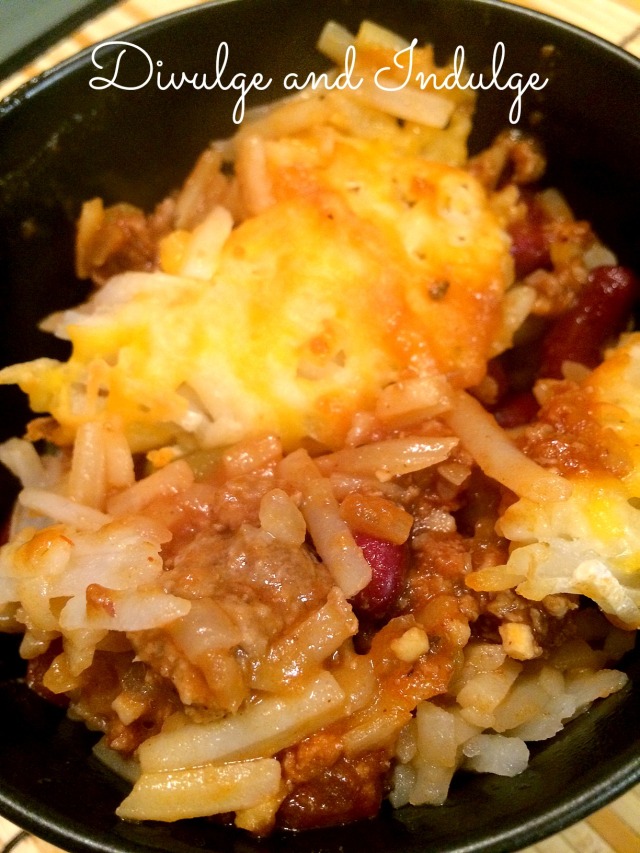
Tasty Tuesday: Cheesy Hash Brown Chili

Last week I shared my food related goals for October.  One of those goals was to post at least two "good for game day" recipes, and this Cheesy Hash Brown Chili is the perfect meal for a day of lounging around the house watching football (or a million episodes of whatever show you're currently addicted to on Netflix).

Chili2
So delicious and so comforting!


I made this meal once several years ago, but I'd completely forgotten about it.  I was looking for something different to make using ground beef, and when I couldn't find anything that appealed to me online, I started flipping through an old notebook that I remembered jotting some recipes in a long time ago.  When I saw this Cheesy Hash Brown Chili, I knew I had to make it again!

The first time I made it, I followed the recipe exactly.  I was still learning a lot when it came to cooking, and I definitely wasn't confident enough to make any changes to recipes!  These days, it's rare for me to follow a recipe exactly.  I usually will if I can't think of anything that would make it better or if it's a dessert (though even then I'll sometimes make a few changes) ... But typically I'll try to, at the very least, tweak the flavors a bit.

I'm so glad I decided to do that this time around!  It's amazing what a few extra spices can do to make a recipe go from good to great.  And I promise ... This recipe is great!  (If I do say so myself.)

So if you're looking for something warm, comforting, delicious, and perfect for game day, this is the meal for you!

Chili1
Seriously ... Make this soon!


Cheesy Hash Brown Chili

Adapted ever so slightly from a recipe on The Rachael Ray Show.


Ingredient List:
  • 2 tbsp olive oil
  • 1 lb ground beef
  • 1 white onion, diced
  • 2 cloves garlic (or, if you're lazy like me, the equivalent of jarred, pre-minced garlic)
  • 1 4 oz. can diced green chilies
  • 1 15 oz. can red kidney beans, rinsed and drained
  • 1 15 oz. can diced tomatoes
  • 1 6 oz. can tomato paste
  • 1 lb frozen shredded hash brown potatoes
  • 1 1/2 cups cheddar Jack cheese, shredded
  • 1 tbsp chili powder
  • 1 tbsp cumin
  • 1 tsp paprika
  • 2 tsp Mexican oregano
  • 2 tsp black pepper
  • 1 tsp sea salt
  • 1 tbsp hot sauce (I used Frank's Red Hot sauce)
  • 1 cup water

Instructions:

1.  Preheat the oven to 400 degrees.

2.  Heat the olive oil in a large skillet over medium heat.  Add the onion and cook for approximately 5 minutes, or until the onion has softened.

3.  Add the garlic and cook for 30-60 seconds, or until fragrant.

4.  Add the ground beef, chili powder, cumin, paprika, Mexican oregano, black pepper, and sea salt.  Cook until the meat is mostly browned, breaking it up as it cooks.

5.  Add the tomato paste and stir until well combined with the meat, onion, garlic, and spices.

6.  Stir in the hot sauce, red kidney beans, diced green chilies, diced tomatoes (with their juices), and water.  Bring the chili to a boil.

7.  Partially cover the skillet and turn the heat to low.  Allow the chili to simmer for about 20 minutes, stirring occasionally.

8.  Spray a 9x13 inch pan with cooking spray.  Pour the chili into the prepared dish, making sure to spread it as evenly as possible.

9.  Add the frozen hash browns, again spreading them as evenly as possible, then sprinkle the cheese over the entire dish.

10.  Bake the chili for 30-35 minutes (I baked mine for 30 minutes), or until the chili is bubbling and the cheese has completely melted and browned a bit.

I served this with a side of Steamfresh vegetables in an effort to make the meal a little healthier.  (And because I'm not very creative when it comes to side dishes.)