And, to be honest, I also don't like the fact that it's much more difficult for me to get creative with a dessert recipe. I have some knowledge when it comes to cooking, so I understand how different cooking methods might change a recipe. I also feel confident when it comes to changing up ingredients and spices because I know what flavors work well together. This knowledge allows me to find a recipe and either tweak it to suit our tastes or use it as a general guideline for a completely adapted recipe. It also allows me to occasionally come up with my own dishes (something I still get really excited about!).
My mother-in-law and her sisters hold a cookie exchange every year around Christmas. I've been going to the exchange since Eric and I got engaged in 2012, and it's always a little stressful for me because, as I said, I don't really bake that often. I mean, I obviously want to make something that people will actually like ... And since I'm not really that confident when it comes to making cookies (with the exception of these), I'm never sure what I should bring.
Luckily this year they asked for something specific: fudge. (And hey, I didn't even have to worry about baking it!) Fudge isn't something I've made often, though, so I was a little worried that it wouldn't turn out well. (I'd only made it twice before making 3 batches for this exchange.)
Since I don't really have a go to fudge recipe, I started searching Pinterest for something that looked like it would be both easy and delicious. And let me just say that there are a shit ton of fudge recipes on Pinterest. Seriously. I started getting a little overwhelmed because there were just so many options.
After several hours (I wish I were joking), I finally settled on 2 types of fudge. One has a white chocolate base and the other, which I'll be sharing with you today, is a more classic fudge. (Don't worry, I'll share the white chocolate fudge in a future Tasty Tuesday post!)
I was really hoping this fudge would turn out well, but oh my God ... It was amazing! And the best part? It was one of the easiest things I've ever made.
The Easiest Chocolate Fudge You'll Ever Make
A recipe from Real Mom Kitchen.Ingredient List:
- 1 12 oz. bag semi-sweet chocolate chips
- 1 cup milk chocolate chips
- 1 14 oz. can sweetened condensed milk
- 1/4 cup unsalted butter
- 1 tsp vanilla extract
- Any toppings you like (examples include sprinkles, chopped nuts, crushed peppermint candies, or chopped Reese's Peanut Butter Cups)
Instructions:
2. In a large saucepan, combine both types of chocolate chips, the sweetened condensed milk, and butter.
3. Allow the mixture to melt together over low heat, stirring regularly to prevent clumping and burning. (It's very important not to walk away once you start the melting process!)
4. After the chocolate mixture is completely smooth and melted, remove the pan from the burner and stir in the vanilla extract.
5. Pour the chocolate mixture into the prepared pan, spreading it as evenly as possible.
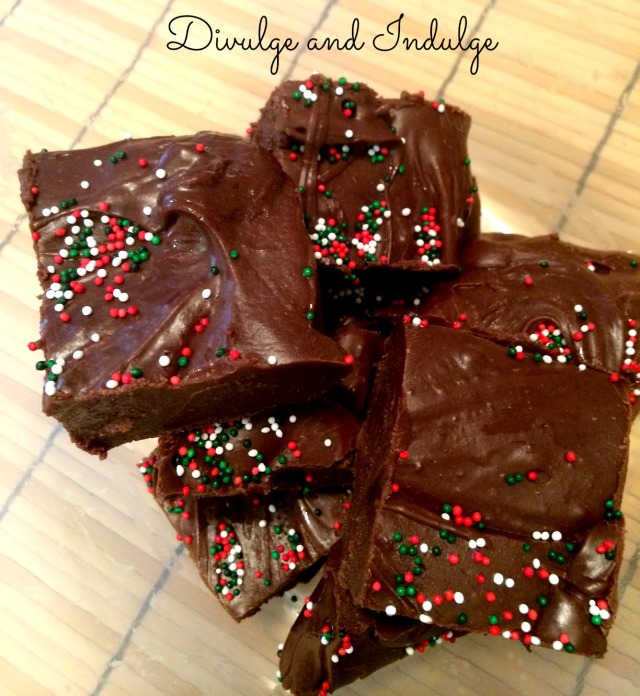
6. Sprinkle on any toppings you want to use (as you can see from the picture, I used sprinkles in holiday colors). You can also leave off the toppings if you prefer plain fudge.
7. Place the pan in the refrigerator to allow the fudge to set. (I left mine in the fridge for 2.5 hours, and that seemed like the perfect amount of time.)
8. After the fudge has set, remove the pan from the fridge. Lift the fudge out of the pan using the wax paper, then cut the fudge into pieces. (I got 25 pieces out of each batch.)
If you're looking for a quick and simple treat to make for the holidays, this is perfect (unless you don't like chocolate, of course). I'm sure I'll be making this again in the future!


mmm looks delicious!
ReplyDeleteThey look so delicious! I love your blog, your posts are all so amazing :)
ReplyDeleteThanks! I wasn't really sure how it would taste since the recipe seemed ridiculously simple, so I was really happy with the way it turned out!
ReplyDeleteThanks again! I really appreciate that! :-)
ReplyDeleteWow! Just tried to eat the picture.
ReplyDeleteI'm glad you liked it! It tasted as good as it looked (which is always a great thing)!
ReplyDelete